Here we will look at how to setup Azure Machine Learning for use with D365FO. Demand forecasting has been standard functionality for a while – Azure Machine Learning replaces the SQL Server Analysis Services time series algorithm used by Ax 2012.
Azure Machine Learning is essentially a cloud based predictive analytical solution. In this example, we are using it to predict demand for future time periods based on historical demand. I’m using the standard demo data, and other than the parameters noted below, no other setup was required.
An overview of the D365FO Demand Forecasting functionality can be found here – https://docs.microsoft.com/en-us/dynamics365/unified-operations/supply-chain/master-planning/introduction-demand-forecasting
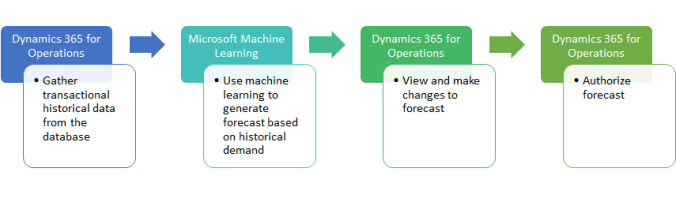
but the diagram below illustrates the function quite nicely if you are unfamiliar with it –
D365FO Setup
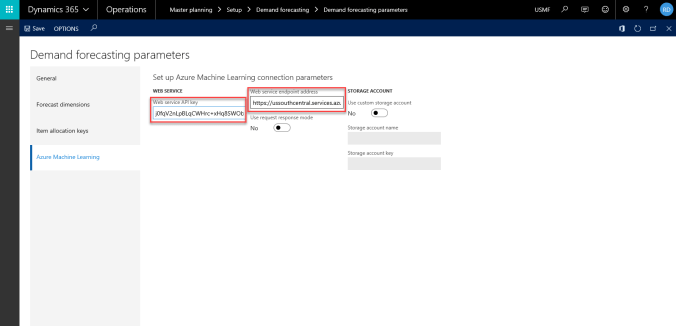
Our first setup task is the Demand forecasting parameters – the Forecast generation strategy on the should be ‘Azure Machine Learning’.
Master planning \ Setup \ Demand forecasting \ Demand forecasting parameters

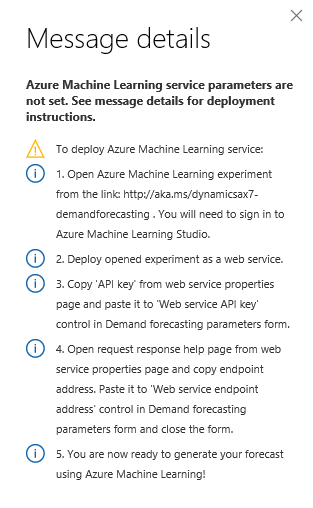
Once set, you will see a warning Infolog popup –

Click on Message details to reveal the remaining setup steps.
Azure Machine Learning Studio Deployment
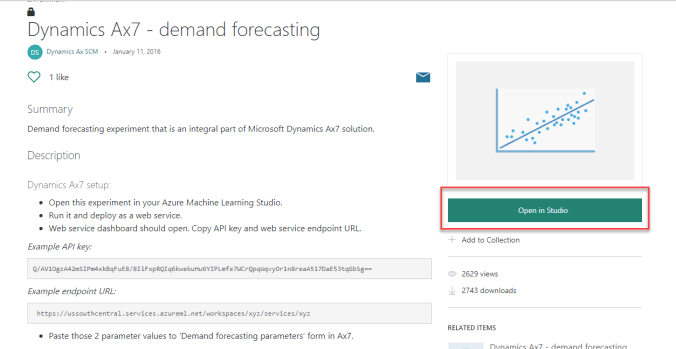
Our next step is to setup the experiment in Azure Machine Learning Studio. To get started, follow the link embedded in the message – http://aka.ms/dynamicsax7-demandforecasting – which takes us to the Demand Forecasting experiment in the Cortana Intelligence Gallery. The Cortana Intelligence Gallery is like an app store for Machine Learning.
Select the green ‘Open in Studio’ button to continue with the deployment.
Next you will be asked to sign up for an account. The free tier will work fine for this example.
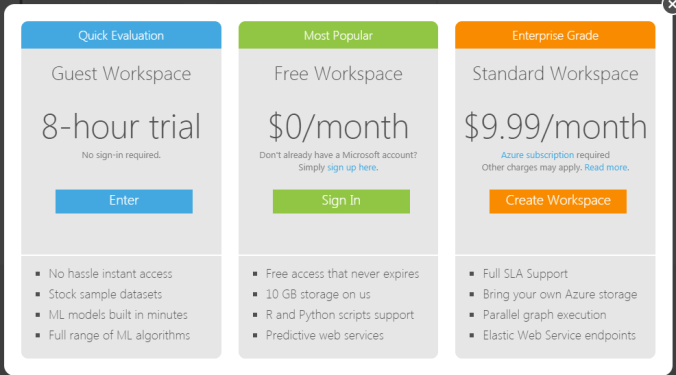
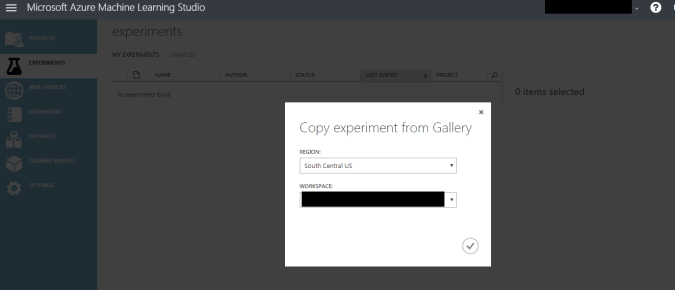
Once your account is active, you can deploy the experiment from the gallery & select an Azure region for deployment.
If you need the standard workspace, you will be billed via your Azure subscription.
If you are deploying D365FO on-premises you will also need a Azure storage account.
Step by step instructions on how to sign up for a 30-day Azure trial can be found here – https://azure.microsoft.com/en-us/trial/get-started-machine-learning/
If you need help with any of these steps or are interested in seeing how best to structure your licensing spend, contact us.
Once deployed the Azure Machine Learning Studio designer is displayed. It shows our demand forecasting experiment. The Studio surface shows two types of inputs – manual data and data received from a web service (D365). Below that an R script generates our forecast, our data is then split and returned via the calling webservice.
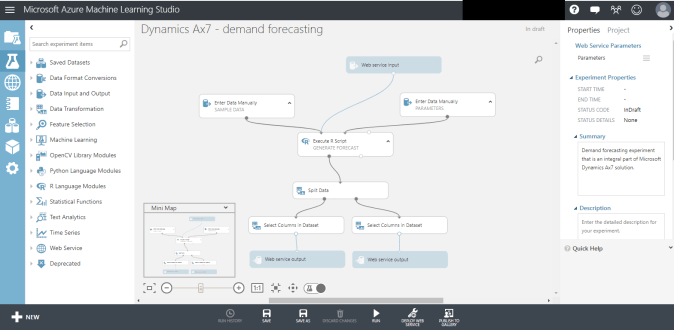
Inputs
Our experiment has three inputs.
- Web service input – input received (data and parameters) from D365FO
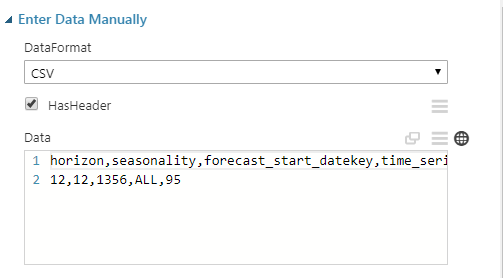
- Sample Data – this is sample data that will be used when we run the experiment stand-alone.
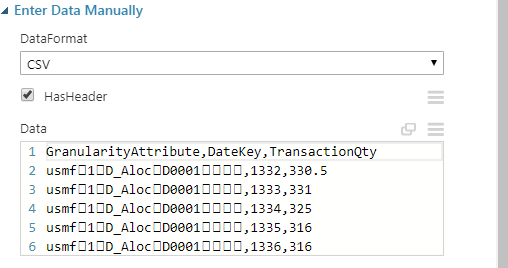
- Parameters – these are the sample parameters used in conjunction with the sample data above to run the experiment
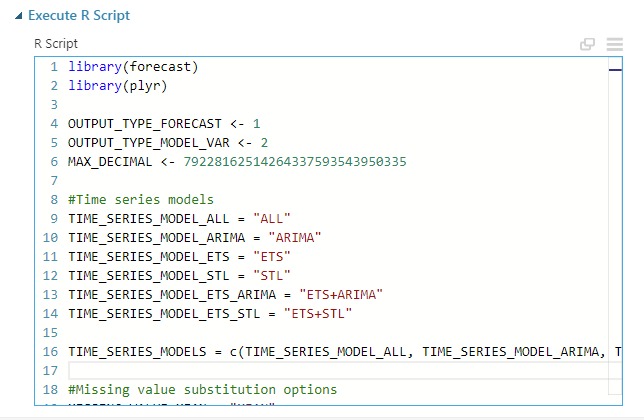
Generate Forecast
Written in R, a statistical computing and programming language, this is where the brains of the operation reside. R is in part named after the S statistical programming language on which it is based, and its creators, Ross Ihaka and Robert Gentleman, who lectured at the University of Auckland & whose classes I sporadically attended.
In a gross over simplification, the script restructures and validates the data before generating the forecast based of the model we have chosen to use.
For more information on R, this white paper & the R Project site are good starting points.
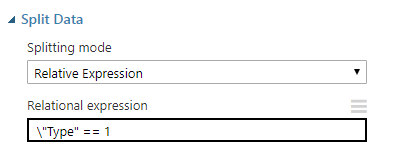
Split Data
The Split data step is a data transformation. We are splitting out dataset output from the R script into two groups, based on the value of the Type column. This gives us two datasets – one good, one with all errors.
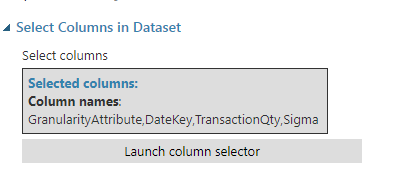
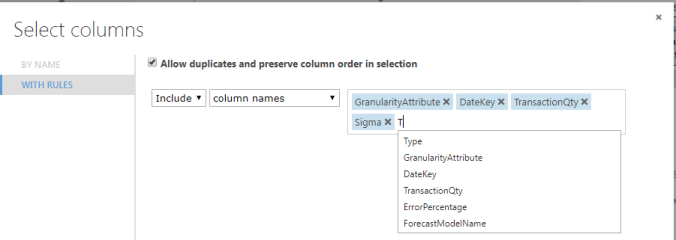
Select and Return Datasets
Lastly, we select specific columns we want to return from the datasets and return these to the calling webservice.
Deploy the Web Service
We next need to run the script. This validates it so we can deploy the web service we’ll need next.


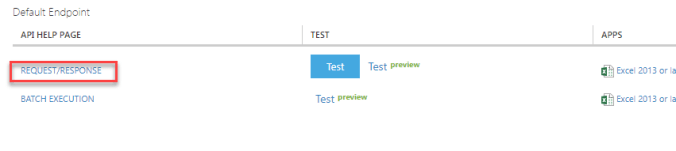
Once deployed, you’ll be able to grab the API key –

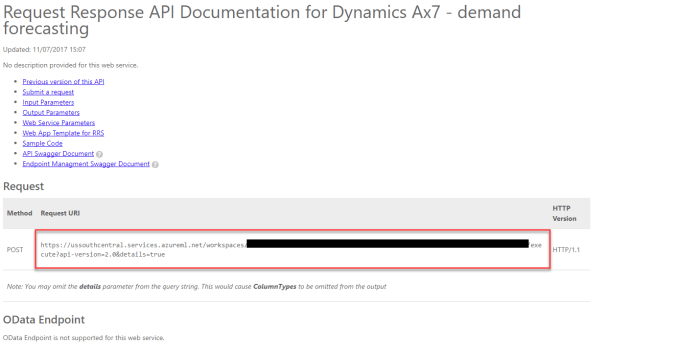
Click on the ‘API help page’ for the REQUEST/RESPONSE to get the web service URL –
For the webservice URL, include everything up to the /execute?api… section, similar to this –
Parameter Update
Finally, now we have them we need to update the Demand forecasting parameters with our values obtained above.
Execution
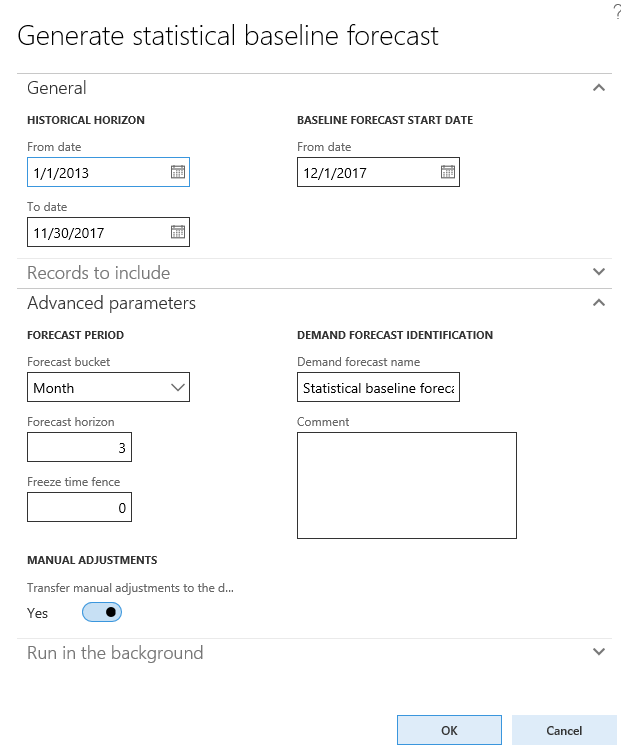
Now we’ve finished the setup, we can run demand forecasting from Master planning \ Forecasting \ Demand forecasting \ Generate statistical baseline forecast. In the parameters below, I selected to generate my forecast for the next 3 months.
And about 10 minutes later…


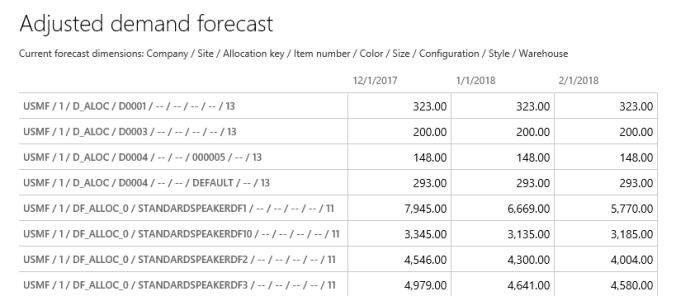
Now it’s executed successfully, we can view the forecast from Master planning \ Forecasting \ Demand forecasting \ Adjusted demand forecast.